Getting Started
Welcome to the demo site for the Divi Table Of Contents Maker plugin! On this page, you notice we are providing instructions about how to use the module, and using our table of contents module to help you navigate the instructions. Keep in mind that we have a separate documentation area with a full video guide and additional information, so be sure to check those resources as needed.
Install Divi
Our Divi Table Of Contents Maker plugin is a 3rd party addon for the Divi Theme by Elegant Themes, so having Divi installed and active is a prerequisite for installing and using our product.
Disclosure: The link to Elegant Themes is an “affiliate link” which means if you click on the link and purchase anything, we will receive a commission.
Download The Plugin
After completing the purchase, download the plugin .zip file from the orders page in your account or click the download link in your purchase confirmation email and save the file to your computer. If you purchased this product from the official Divi Marketplace, you can download the product from your Elegant Themes members area.
Install The Plugin
Now that you have Divi installed, and the plugin downloaded, you are ready to install the Divi Table Of Contents Maker plugin. Installing our plugin works the same as installing any other WordPress plugin. From your WordPress Dashboard, go to Appearance>Plugins>Add New and click on Upload Plugin. Locate the plugin .zip file on your computer, which selects the file to up, and click Install Now. Once the file upload is finished, you can click on Activate.
Add Your License Key
After installing and activating the plugin, the next step is to add the plugin license key. This allows your site to communicate with our servers to ensure that you get automatic updates and support. You can find your license keys by clicking the License Keys button in your Account Orders page. More information about using license keys is available in our Product License Key Management documentation.
If you purchased From Divi Marketplace, then there is no license key to add. Updates and support for the plugin are validated using your Elegant Themes account, so just take a moment to be sure you have the proper Username and API key credentials added in the Divi> Theme Options> Updates tab in your website. Note that there is no additional license key to enter for this product, it is handled entirely by your Elegant Themes account credentials. You can refer to the Divi Marketplace Customer FAQs for more information.
Add The Module To Your Layout
Now the exciting part, adding the module to your layout! Everything about the Divi Table Of Contents module works just like any other Divi modules, so our plugin will be very easy to use for anyone already familiar with how Divi works. Within the Divi Visual Builder layout, click the gray plus button to add a new module. The quickest way to find the module is to use the search bar and type “table of.” You will then see our custom module, which is named “Divi Table Of Contents Maker.” Click on the module to add it to your layout.

Understand How The Module Works
It is important to have an overview of what the plugin does behind the scenes. When you place the module in a post or page, it will automatically populate the table of contents itself – there is no need to add any links manually. This dynamic population feature is the benefit of using this plugin. Basically, the code of our plugin is programmed to scan the current post or page for any H1-H6 headings. All the headings that it finds within the criteria designated in the settings will then be assembled as links within the table of contents.
Please Note: The actual live links from your post or page will not be shown in the table of contents within the Divi Visual Builder, and will only appear as the real links when viewing the page on the frontend. Only placeholder text will appear in the TOC in the Visual Builder. This is due to the nature of how the links are auto-populated after exiting the builder.
Explore The Module Settings
At this point, you are ready to start setting up the table of contents plugin. We highly recommend that you get familiar with the module by reviewing all of our documentation. In the list of links in the sidebar and below, we have provided documentation for all the plugin features and settings. We suggest starting with the complete module settings and features list to get an overview of all the custom settings.
Set Up & Design The Header
The header is the top section of the table of contents with the title and the toggle icons. This area has its own design settings, as well as various settings related to the header.
Show Or Hide The Header
There may be some times when you don’t need to show the title or show the collapse icon, and simply want to show the content. In that rare case, you can simply toggle the setting to hide the entire table of contents header.

Design The Header Area
The header area design can be adjusted from the Design tab using settings in the Header toggle. This includes all the standard design settings such as margin, padding, background color, rounded corners, borders, and box shadow.

Write & Design The Title Text
Write A Title
By default, we already have a “Table Of Contents” title, but you can change this to “Contents” or “Outline” anything else you want by writing custom text in the Title field.

Design The Title Text
You can style the table of contents Header Title Text in the Design tab using all the standard font and text settings, such as font selector, font weight, font style, alignment, color, text size, letter spacing, line height, and text shadow.

Show Or Hide The Header Icon
The header icon normally serves a functional purpose to collapse and expand the table of contents. However, if you are not using the collapse feature (more about that below), you can still choose to show an icon even though it is purely decorativ.
Set The Icon Position To The Left Or Right Side
You can choose to place the icon on the left or right side. This works whether you are using it functionally to collapse and expand the table of contents or just for decoration.
Here is a nice example of the icon used for decoration on the left:
Allow Viewers To Collapse Table
You may want to give your blog viewers the option to collapse the table of contents. This may be useful depending on the page layout or depending on what device size they are using. The Allow Collapse/Minimize setting gives the viewer the ability to collapse the table of contents by clicking anywhere in the header area. When this setting is enabled, additional related settings appear below. The setting is enabled by default, but if you turn this setting off, then the toggle icon will hide and viewers will not be able to collapse it.

Choose The Default State
When the Allow Collapse/Expand setting is enabled, you can choose whether you want the table of contents to be Expanded, or to be Collapsed, when the page loads. Keep in mind there are also responsive settings, so perhaps you want to choose expanded for Desktop and collapsed for Phone.

Pick Icons For The Toggle
When the Allow Collapse/Expand setting is enabled, you can pick different icons for the expanded state and the collapsed state. We already have some selected by default, but you can use any icons available in Divi.
NOTE: If you are not using the Allow Collapse/Expand, the “Expanded Icon” will be used for decoration only.
Design The Toggle Icons
The size and color of the Header Icons can be set for both the expanded and collapsed states. The default is white and 30px, but you are welcome to change to fit your branding and header design.
Configure The Included Headings
Now it’s time to choose which heading levels you want to show in the table of contents. We also have settings to exclude headings, and a conditional logic setting to hide the module based on the number of headings that are available.
Select Which Heading Levels To Include
The Included Headings checkbox settings give you the option to choose H1-H6 heading levels. In the screenshot, only H1, H2, and H3 headings are selected. This means any H1-H3 headings in the content of the post will be shown as links in the table, and if there are any H4-H6 headings, they will not be included.

Exclude Any Unwanted Headings
Sometimes you need to make sure that only the headings from the actual blog post are shown in the table, and avoid showing other headings such as the page title, headings, in the sidebar, headings in the footer, etc. To make sure this doesn’t happen, you can enable the Exclude Headings By Class setting and add the CSS class pac-dtocm-exclude to any section, row, or module that you want to exclude the headings from being added to the table of contents.
NEW in version 1.3 – include headings by class! This is a very important new feature, and one that should be very useful. Instead of “excluding” headings by class which we did before, now you can “include” headings by class. The reason this is so helpful is because sometimes it required adding the class to many different sections, row, or modules to exclude everything in larger Theme Builder templates. Now you can simply add the
Like before, you can add the class to any section, row, or module in your Divi layout. Just use the CSS classes “pac-dtocm-exclude” to exclude headings in the TOC from that element or “pac-dtocm-include” to include headings in the TOC from that element.

Hide Entire Module Based On Conditions
When you use the table of contents module in a Theme Builder template, you may have posts that have a different amount of headings. A table of contents is not always needed for short posts with only a few headings, so we have included settings to conditionally hide the module based on a minimum number of headings in the content. Use the options in the Hide Entire Module If dropdown setting to determine your preference.

Scroll Speed
If you have a lot of headings, it can take up to 10 seconds after clicking a link to scroll to the bottom of the post, due to the smooth scroll. So we solved this by adding a scroll speed, which basically acts as the maximum allowed speed within the smooth scrolling. We set it to 2 seconds by default, which seems pretty nice.

Heading Link Top Offset
When you click on a link in the table of contents, it scrolls to the corresponding heading. The page stops scrolling and stops when that heading is at the top of the page. But if you have a sticky header, the heading text may overlap with that sticky section. To solve this, we have added a setting which allows you to adjust the vertical space between the top of the page and the current heading in the content. This Top Offset setting is located in the Content tab in the Content Settings toggle.

Highlight Active Link
This setting allows you to choose whether to show the current heading from the content area as a highlighted active link in the table of contents. It is a nice feature to show the highlighted link to give readers of what part of the entire document they are currently viewing.

Set Up & Design The Content
The content area is the main section of the table of contents with the heading links. This area has its own design settings, as well as many settings related to the headings.
Height And Scrollbar
Limit Content Height
If you want to set a maximum height for the content area, you can use this setting, which provides additional options for setting the height and styling the scrollbar. However, if you do not want to limit the height, simply disable this setting and the content area will expand to full automatic height.

Set A Content Height
When you have a lot of headings in your content, the table of content can get very long and could become too tall for the page. This setting allows you to set a maximum height for the content area of the module, which automatically enables a scrollbar if the content is taller than the designated value.

Adjust The Scrollbar Design
When a maximum height is set for the content area, a scrollbar automatically appears. We added some default styles for that, but you can customize it however you want!

Design The Content Area
The content area design can be adjusted from the Design tab using settings in the Content toggle. This includes all the standard design settings such as margin, padding, background color, rounded corners, borders, and box shadow.

Set Up The Markers
Choose Markers For Each Heading Level
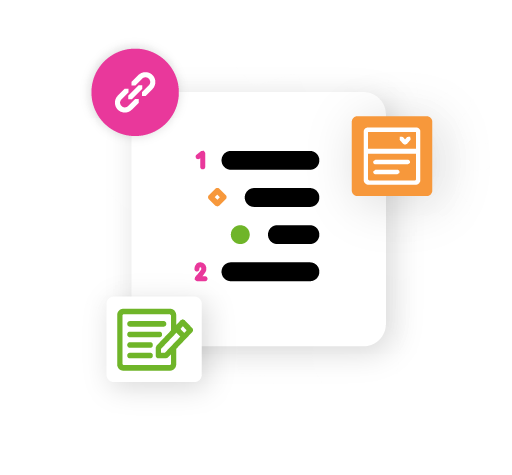
We are excited to offer many options for adding markers as prefixes to the left side of each heading level. The options include any icon available in the Divi icon picker, whole numbers (1, 2, 3), whole number with leading zeros (01, 02, 03), decimal numbers (1.0, 2.0, 3.0), decimal numbers of parent level (1.1, 1.2, 1/3), uppercase letters (A, B, C), lowercase letters (a, b, c), uppercase roman numerals (I, V, X, L), and lowercase roman numbers (i, v, x, l).

Design The Markers
The Content Heading Markers can be customized for each heading level. You can use the All tab to adjust all the markers the same, or use the individual H1-H6 tabs to style the markers for each heading level. Settings include all the standard font and text settings, such as font selector, font weight, font style, alignment, color, text size, letter spacing, line height, and text shadow.

Design The Heading Text
The Content Heading Text including the default links text, underline color, current link color, and current link underline color can be customized for each heading level. You can use the All tab to adjust all the markers the same, or use the individual H1-H6 tabs to style the markers for each heading level. Each tab includes all the standard font and text settings, such as font selector, font weight, font style, alignment, color, text size, letter spacing, line height, and text shadow.

Indent Each Heading Level
For visual hierarchy, it helps to indent child heading levels under the parent levels. You can use this setting to enable or disable the indent for each heading level, and also adjust the indent amount to your preference.

Select Heading Wrap Preferences
This setting is for headings that are a bit longer. It simply gives you the choice of what to do when a heading text is wider than the table of contents, whether you want to wrap to a new line (default behavior) or cut it off and add an ellipsis.

Sticky Settings
These settings are related to making the table of contents module sticky when scrolling.
Stick To Top
If you want the table of contents to stick to the top of the page as you scroll, either like the demo here on the side or at the top, then you would need to adjust the Scroll Effects in the Advanced tab of the module.
You can also set the vertical distance between the top edge of the screen and the module when it is in the sticky position. In our example, we have set the Sticky Top Offset to 50px, but you can adjust that to any value.

Auto Collapse When Sticky
When you make the table of contents sticky, you may also want it to collapse automatically as you scroll to get it out of the way. This is especially useful on mobile to save space and make it collapse at the top but still be available. So now you can enable this per devices as needed, pretty cool!

Collapse To Icon Only
We love giving you options! Now you hide the title and collapse the table of contents into a single icon. Works beautifully in a sidebar!
Keyword Highlight
These settings are related to making the table of contents module sticky when scrolling.
Enable Keyword Highlight
This is a feature that is not very common, but one that I find very helpful, and a few sites are starting to have it. If you enable the keyword highlight feature, a new search field will appear inside the table of contents. In that field, you can type any word that you want to find in the post, and it will highlight the word in the content of the post.

Design The Search Box And Keywords
There are design settings for every aspect of this keyword highlight feature, including the search field and the highlighted words in the content.
